Today we invited our friend Matt and our bro Brandon over for vegan Easter brunch. I knew earlier this week that I wanted to find a vegan waffle and vegan whip cream recipe to make for Easter brunch. I bought all the ingredients for both, but also bought Soyatoo whip cream, just in case I didn't have time to make the whip cream from scratch. And, this morning, I, in fact, didn't have time to make my vegan whip cream-bummer! The consensus after spraying a bit of the canned Soyatoo for everyone to try was that it tastes like real whip cream. Thumbs up in my book!
If I knew how awesome these waffles would turn out, I would have invited more people over! Now that we know the recipe is top-notch, we will be able to continue the tradition of the Hibbard breakfast parties. We'll have to test a few more vegan breakfast recipes and we'll be in business!
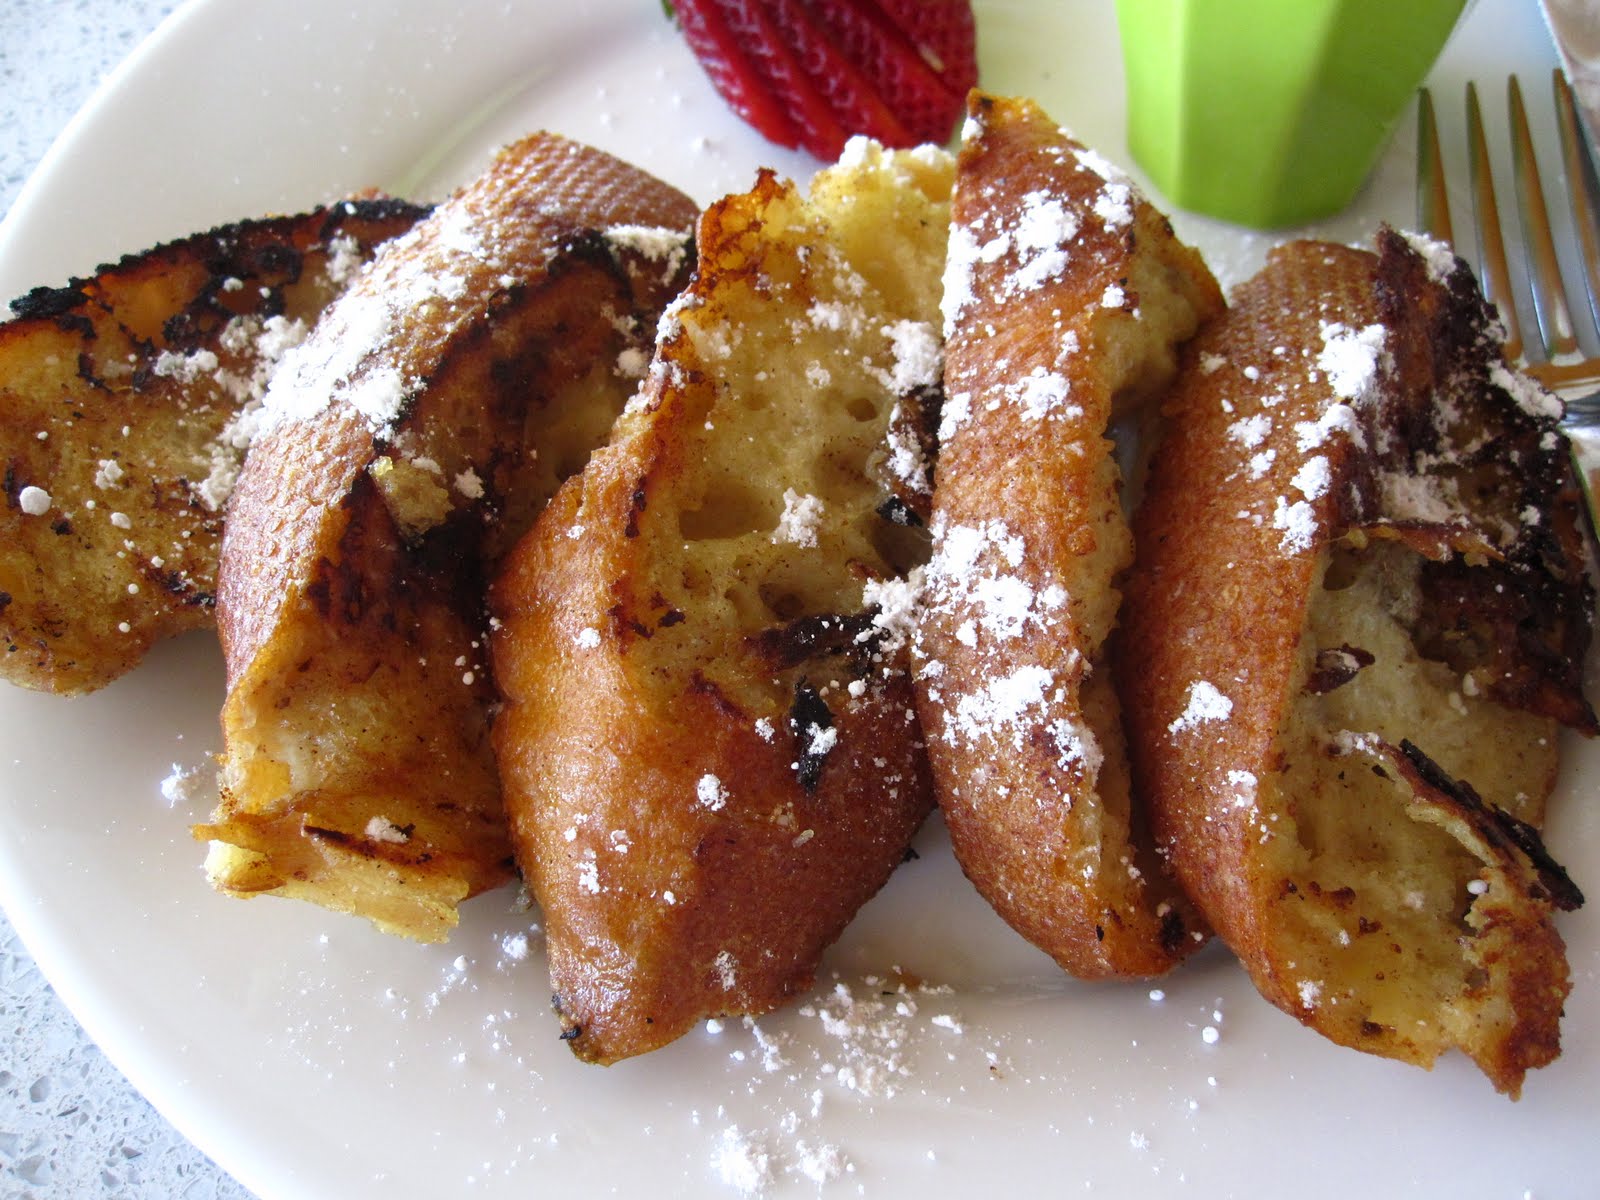
In my hunt for vegan waffle recipes, I can across
Vegan Food; More Than Tofu And Spouts . An inspiring blog with recipes that make my mouth water. Our waffles turned out fluffy and perfect! We cut fresh strawberries and blueberries to serve with our vegan whip cream and pure maple syrup. We also made fresh orange juice and served mimosas. What a perfect brunch-great food, good company and relaxation! And, the dogs had a fun chillaxin' today, too.
Vegan Waffles
From Tofu N Sproutz blog
1 cup whole wheat pastry flour
1 cup white flour
1/4 tsp salt
4 tsp baking powder
2 cups soy or almond milk (I used vanilla almond milk, but use whatever - rice milk is too thin)
1/4 cup plus 1 Tbsp oil
2 Tbsp ground flax seed whizzed with 6 Tbsp soymilk or almond milk
1 tsp vanilla extract
In a large bowl, combine flour, baking powder and salt.
In a blender or food processor, combine remaining ingredients and process until well-combined and "airy".
Add milk mixture to the dry ingredients and mix until moistened - don't overmix or the waffles will turn out tough and heavy, a few lumps are fine.
Mixing the wet ingredients in a blender introduces lots of air bubbles, to make the waffles light and fluffy.
Cook according to your waffle maker.
The batter is enough to make 4 - 5 large Belgian waffles.
Here is the vegan whip cream recipe that I didn't get to make today from
Diet, Dessert and Dogs Blog
Coconut Whipped Cream
This is a great topping for fancy desserts. To make the cream, you will need a hand (immersion) blender (a regular blender won’t work for this) and electric beaters.
1/3 cup (80 ml.) vanilla rice milk
2 tsp. (10 ml.) home-ground agar “powder”
2 tsp. (10 ml.) plus 1 Tbsp. (15 ml.) cornstarch, divided
2 scant Tbsp. (25 ml.) agave nectar
pinch sea salt
1 tsp. (5 ml.) pure vanilla extract
1 can (398 ml.) full-fat coconut milk (22% fat content), at room temperature (shake well before opening)
Step 1: In a small pot, combine the rice milk and agar. Allow to sit, covered and at room temperature, for at least 30 minutes.
Step 2: Stir everything but the 1 Tbsp. cornstarch into the agar mixture and whisk to combine. Cook over medium heat, stirring constantly, until the mixture just begins to boil. Lower heat so that the mixture is still bubbling just under the surface, and set a timer for 10 minutes. While it continues to cook, stir every minute or so.
After 5 minutes, choose one of the following options: (1) if all the agar is dissolved (and no longer visible on a rubber spatula or spoon), remove from heat and turn off the timer (just forget about the last 5 minutes). Pour into a bowl and proceed to step 3.
then continue to cook for the remaining 5 minutes on the timer, and stir every minute or so. After 5 more minutes (10 total), remove the mixture from the heat, even if there are still tiny bits of agar left in it (they will be blended out next). Pour into a bowl and proceed to step 3.
Step 3: Pour the mixture into a deep bowl. Immediately blend with your immersion blender until perfectly smooth and no bits of agar are visible (careful, it’s hot and may spray a bit!). Set aside to cool somewhat.
Step 4: When the mixture is still slightly warm but no longer hot (and still fairly liquid), sprinkle the remaining 1 Tbsp. cornstarch over the top; using the immersion blender, blend again to even out the texture and get rid of any little lumps. Place the bowl in the refrigerator until the mixture is ice-cold; it will become very solid, like an extremely firm gel.
Step 5: Once again using the immersion blender, blend the gelled mixture until it is perfectly smooth and no lumps remain, but don’t blend any more than necessary. Scrape down the sides as you go.
Step 6: Now, using the beaters, beat the smoothed mixture until soft peaks form. If the mixture is cold, this should happen fairly quickly. You’ll have a soft cream that holds very soft peaks, but definitely holds its shape.
Step 7: At this point, you can mound the cream over a pie, or put it in a piping bag and gently pipe it. It will seem too soft to pipe, but as long as it holds a shape in the bowl (and the surface of the cream doesn’t “melt” and flatten), it can be piped.